System
For Sailfish OS system software topics
- Expand root partition
- The options for increasing the space
- Use the space from an unused partition
- Increase the root partition size with an SD-card
- Full backup of system (image)
- Useful command-line settings
- System update preparations
Expand root partition
Your root filesystem is full and you can’t install any apps anymore? This guide will provide several options to gain extra space to your root partition.
The options for increasing the space
There are several options to increase the space of the root partitions. Currently available options are:
- Use the space from a unused partition (Not on Xperia X). This option has the drawback that if you want to reflash your device with SailfishOS, the flashing won't work, you need to restore the partition first, e.g. by flashing Android.
- Shrink the home partition and add this space to the root partition. This means you have less space available on the user parition afterwards.
- Configure an SD-card to extend your root partition. Your SD-Card has to be inserted all the time for the device to work.
Use the space from an unused partition
Overview
Most Sailfish X devices have a partition left over from Android which is completely unused. Newer Android phones have partitions labelled system_a and system_b, which were used by deliver OS updates as full partitions without overwriting the used one. On next reboot, Android just switches the partition to boot from. SailfishOS only uses system_b, as it doesn’t provide kernel updates.
This does only work on devices with a /dev/disk/by-partlabel/system_a and a /dev/disk/by-partlabel/system_b partition, e.g. the Xperia XA2. It does not work on devices with only a /dev/disk/by-partlabel/system partition like the Xperia X!
Warning! 4.6.0.15 started to use the same system_a partition:
Xperia XA2 and Xperia 10
Partition opt2 was created to allow for more space for AppSupport on Sailfish 5.0.0 (but only if the partition is not already used).
This means that this is not necessary or, if you already used the system_a, you can’t udpate through GUI but use command line.
Preparations
You need shell access and root access for this guide. You get shell access by enabling the development mode. You become root by executing devel-su and entering the password you set in the development mode settings.
It’s good to have a full system backup, e.g. with restic or borg.
Add the partition to LVM
To start, you have to add /dev/disk/by-partlabel/system_a to the Logical Volume Manager.
- Enter
pvcreate /dev/disk/by-partlabel/system_ato prepare the partition for LVM. - Secondly, type
vgextend sailfish /dev/disk/by-partlabel/system_ato add the partition to thesailfishvolume group.
If you get messages similar to this:
/dev/mmcblk0rpmb: read failed after 0 of 4096 at 4186112: Input/output error
Don’t worry. mmcblk0rpmb stands for Replay Protected Memory Block, which is a security storage feature of Android not used by SailfishOS. When the programs you just executed scan all partitions, they won’t be able to read this secure storage, hence the error message.
Extend the sailfish root filesystem
Now the space of the sailfish volume group is extended by the size of the system_a partition and we can continue with adding the new free space of the volume group to the root volume.
- This is done with
lvextend sailfish/root -l +100%Free, which tells LVM to assign all free space in thesailfishvolume group to therootvolume. - In the end, we resize the root filesystem to the new size of the
rootvolume by enteringresize2fs /dev/mapper/sailfish-root. This can be done while the filesystem is mounted, which is a nice feature of ext4.
Now you can proceed with installing apps or starting the system update.
Increase the root partition size with an SD-card
This guide adds the SD-card to the LVM volume group and then uses the new space in the LVM volume group to increase the root partition.
Full backup of system (image)
Make a full backup of your system (as an image) which you can flash whenever something goes wrong.
Create a backup image from recovery
Step 1: Enter recovery mode
(see also here)
Step 1.1: Turn your phone completely off and disconnect any USB cables
Step 1.2: Install fastboot drivers on your computer (for instructions see here)
Step 1.3: Force your phone to the fastboot mode
- Hold the Volume Up key down and connect a data-connected USB cable (a charging cable would not work)
- Ensure that the LED at the top of the display area is lit in BLUE colour (if not, disconnect the cable, release the key and try again)
Step 1.4: Boot into recovery with the recovery image you got when you downloaded SailfishOS.
Attention: This should be of the same SailfishOS version as your phone
Execute the following commands in the same directory as your recovery image (on Linux and macOS with sudo):
For Xperia 10 II and Xperia 10 III:
fastboot flash boot_a hybris-recovery.img
fastboot flash boot_b hybris-recovery.img
fastboot reboot
For Xperia X, Xperia XA2 or Xperia 10 :
fastboot boot hybris-recovery.imgStep 1.5: Connect to your device with
telnet 10.42.66.66Step 1.6: Type in "3" to open a shell. You will be asked for the security code/password of your phone
Step 2: Mount microSD-card
Mount your microSD card with the following command. Your SD-card needs to have at least 105GB of free space.
mount /dev/mmcblk0p1 /mntStep 3: Do the backup
Execute:
dd if=/dev/sda79 of=/mnt/backup.img bs=1MNote: This can take 40+ minutes. During this time, no progress is shown. If you would like to see progress, open a second telnet connection and execute watch -n5 'kill -USR1 $(pgrep ^dd$)', which will show progress (in the original telnet session) every 5 seconds.
Step 4: Unmount the memory card
Once the backup is finished, unmount the microSD-card with:
umoumt /mnt Step 5: Exit recovery mode
After unmounting, first, exit the shell environment by typing
exit This will bring you back to the recovery menu. Here, now select "6" (Exit) which will close the telnet session.
Next, disconnect the USB cable from the phone. After that, you need to force power-off your device by pressing the Vol Up key down, keeping it pressed and pressing the Power key, too. When you feel the vibrator play once and soon after three (3) times (this should happen in about 20 seconds), release both keys. In this way, we ensure that the phone is completely turned off before we proceed to the next step.
Step 6: Reverting the phone back to normal (For Xperia 10 II and Xperia 10 III only, other Sony phones don't need this step)
(see also here)
Step 6.1: Force your phone to the fastboot mode
- Hold the Volume Up key down and connect a data-connected USB cable (a charging cable would not work)
- Ensure that the LED at the top of the display area is lit in BLUE colour (if not, disconnect the cable, release the key and try again)
Step 6.2: Reflash the normal boot image
Attention: This should be of the same SailfishOS version as your phone
Execute the following commands in the same directory as your boot image (on Linux and macOS with sudo):
fastboot flash boot_a hybris-boot.img
fastboot flash boot_b hybris-boot.img
fastboot rebootRestore backup from an image
Step 1: Enter recovery mode
For instructions, look here and here
Step 2: Mount microSD-card
Mount your microSD card with the following command. Your SD-card needs to have at least 105GB of free space.
mount /dev/mmcblk0p1 /mntStep 3: Restore the backup
Execute:
dd if=/mnt/backup.img of=/dev/sda79 bs=1MNote: This can take 40+ minutes. During this time, no progress is shown. If you would like to see progress, open a second telnet connection and execute watch -n5 'kill -USR1 $(pgrep ^dd$)', which will show progress (in the original telnet session) every 5 seconds.
Step 4: Unmount the memory card
Once the backup is finished, unmount the microSD-card with:
umoumt /mntStep 5: Exit recovery mode
For instructions, see here and here
Useful command-line settings
Settings that can't be reached from Sailfish OS graphical user interface.
Battery saving mode all the time
Sailfish OS (5.0) UI allows to start the battery saving mode / power saving mode at will from the Battery setting menu, and to set a threshold from which the battery saving mode is automatically enabled. This threshold can be chosen between 20%, 15%, 10%, 5%… But not higher than 20%.
Even if this mode isn't saving much battery, if you want to have it set all the time you can use this commands from the Terminal :
devel-su pkcon install mce-tools # to install the package that contains the mcetool command line program
mcetool --set-psm-threshold=100 --set-power-saving-mode=enabled --set-forced-psm=enable
This second line enables the power saving mode and sets it to auto-start from 100%. This way you'll be using your phone in power saving mode all the time except when it is plugged (loading the battery).
This setting is kept even after a reboot, just like if you had a 100% label available in the graphical Battery settings to click on.
This information have been summarized from this discussion : https://forum.sailfishos.org/t/please-add-function-for-automatic-power-saving-mode/7322
Blocking phone numbers from CLI in Sailfish OS
Blocking phone numbers from CLI in Sailfish OS
With Sailfish OS 5, it is now possible to block incoming calls, which is especially useful for unwanted calls such as spam calls.
From the SFOS UI
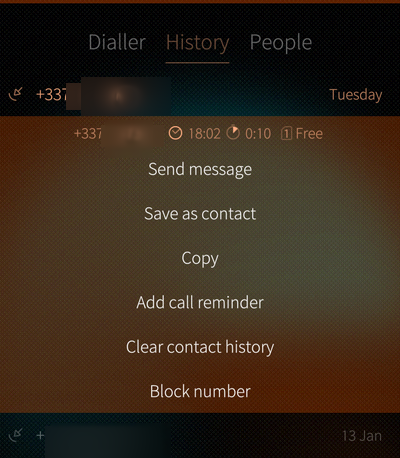
- in the Phone application, go to "History"
- then long press on the phone number you want to block
- then select "Block Number"
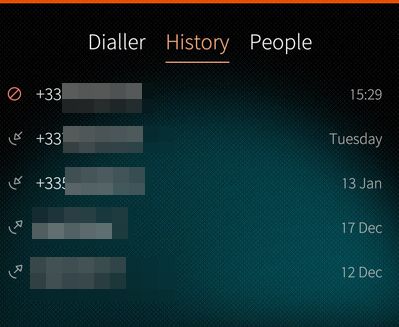
Next time this number calls you, it will go directly to your voicemail, and you'll see it in the calls history with a "blocked" icon:
Using the CLI
You can also do this using SFOS CLI, which comes with the benefit of being able to also specify ranges of numbers - useful for countries where sales calls are due to originate from specific prefixes.
For instance in France, those numbers start with +33949 (and a bunch of other prefixes).
To block this range in SFOS, I would type the following command (as defaultuser user):
dconf write /sailfish/voicecall/filter/rejected-numbers ["'^+33949'"]
and to check that this was taken into account:
dconf read /sailfish/voicecall/filter/rejected-numbers
"Reject numbers" vs. "Ignore numbers"
If you're curious like me, you've probably seen that there are 2 options when it comes to filtering numbers in SFOS. If you enter that command:
dconf list /sailfish/voicecall/filter/
you'll get 2 answers:
ignored-numbers
rejected-numbers
We've used rejected-numbers above, now you may wonder what ignored-numbers is and what's the difference?
Well, fear not as I tested it for you:
rejected numberswill send the call straight to your voicemail, without your caller even getting a ring on their side,ignored-numberswill still send the call to your voicemail, but after the usual 4 or 5 rings for your callers- you will still see the call coming in,
- but your phone won't ring,
- and the call will also appear as "blocked" in your calls history
Import settings for France
dconf write /sailfish/voicecall/filter/ignored-numbers "['', 'anonymous', '^+33162', '^+33163', '^+33270', '^+33271', '^+33377', '^+33378', '^+33424', '^+33425', '^+33568', '^+33569', '+3364466', '+3364467', '+3364468', '+3364469', '+337568', '+337569', '^+33806', '^+33948', '^+33949', '+5909475', '+5949476', '+2629478', '+2629479', '+5969477']"System update preparations
How to free space on the root filesystem (before an update)
This is a copy! The original has been posted by nephros in the SFOS forum and may be more up-to-date.
Having enough space on the root filesystem before an update is a common problem.
This guide intends to give some hints how to free up space.
First things first:
Do not ignore the recommended free space requirements in the Release Notes, and the Update tool!
OTA updates frequently fail if these recommendations are ignored.
Also: Free space on the /home partition is not relevant here. Freeing up caches, or removing other data like Pictures will not help.
Neither will uninstalling Android Apps, as these are also installed in Home.
That being said, /home should also have some free space (at least 1GB) before an update is attempted. Do not update while your /home partition is full.
WARNING WARNING WARNING
#0 You presumably have a brain. Use it. (And do use your own brain, not some hallucinating large language model’s (“AI”) imitation of one.)
Double check instructions, seek help if you’re not sure about something.
If you break something using the content below, you get to keep all the pieces.
#1 If possible, all the removal/freeing up space should be done before selecting "Download Update" in the UI.
#2 Always make sure you are dealing with files in the root (/) partition only. There are many other partitions mounted ( /apex, /vendor and so on). IGNORE THEM. Do not delete anything from there. You have a high chance of bricking your device if you do, and it will also do no good for the issue we are trying to solve.
Just ignore them.
#3 Some sources will list the rpm -e or rpm --erase command.
Never use rpm to install or uninstall packages. (It is okay to use rpm -q to query information.)
#4 Naturally, you have backups. And have tested these backups.
The tools
While possible, finding things to remove using the UI is difficult.
We will be using command-line tools in this guide. This also means you will have to enable Developer Mode, at least during these activities.
If you're not familiar with the Linux/UNIX command line, or are uncomfortable using it, that's ok.
You can still try if you're brave, but please try to understand what you're going to do, and do not blindly copy-and-paste commands from here. And you're almost always safe until the point where you become root, i.e. invoke `devel-su`.
Tip: Using command line tools in the Terminal app is a bit tedious. We recommend logging in via SSH from a proper computer. (There is also a ssh guide for Windows, but we’re talking about proper computers here.)
Install the tools required like so:
# become root
devel-su

# while pkcon works for uninstalling, zypper can detect unnecessary dependencies and remove them too. So we use zypper:
pkcon install zypper
# refresh the package list
zypper ref

# ncdu is a graphical tool for showing disk usage.
zypper in ncdu
1. Finding space eaters
Checking free space
You can check the free space on the root filesystem like this:
df -h /
Example output:
nemo@PGXperiiia10:~ $ df -h /
Filesystem                Size      Used Available Use% Mounted on
/dev/sailfish/root        4.7G      4.4G    333.7M  93% /
Note the Available column. We want to maximize this.
You should regularly check this to see whether you are done. Of course, the more free space, the better.
Checking whether something is installed:
Either tool can be used:
pkcon search --filter installed SEARCHTERM
zypper search --installed-only SEARCHTERM
Example output:
nemo@PGXperiiia10:~ $ zypper search --installed-only whisper
Loading repository data...
Reading installed packages...

S  | Name                            | Summary                                       | Type
---+---------------------------------+-----------------------------------------------+--------
i+ | harbour-whisperfish             | Private messaging using Signal for SailfishOS | package
i+ | harbour-whisperfish-shareplugin | Share plugin for Whisperfish                  | package

nemo@PGXperiiia10:~ $ pkcon search --filter installed whisper
Searching by details
Starting
Refreshing software list
Querying
Finished
Installed       harbour-whisperfish-0.6.0.beta.40-1.aarch64 (installed)         Private messaging using Signal for SailfishOS
Installed       harbour-whisperfish-shareplugin-0.6.0.beta.20-0.sf4.aarch64 (installed) Share plugin for Whisperfish
Finding out what is using up space
Something like rpm -qa --queryformat '%{SIZE} %{NAME} \n' | sort -n -r | head -20 will list the 20 largest installed RPMs.
ncdu -rx / can be used to find space-eaters. It is a graphical (TUI) app which lets you navigate the file system. Always use the -x switch, it ensures that you only look at the correct partition, and not other mounted file systems. -r means read-only, making sure you won’t unintentionally delete any files.
Here’s a “screenshot” of ncdu:
ncdu 1.22 ~ Use the arrow keys to navigate, press ? for help                                                                                                           [read-only]
--- /usr -------------------------------------------------------------------------------------------------------------------------------------------------------------------------
. 939.9 MiB [#########################] /share
  845.4 MiB [######################   ] /lib64
  456.8 MiB [############             ] /bin
  322.7 MiB [########                 ] /libexec
  167.6 MiB [####                     ] /lib
   40.4 MiB [#                        ] /sbin
   34.0 MiB [                         ] /include
  140.0 KiB [                         ] /local
   12.0 KiB [                         ] /src
e   4.0 KiB [                         ] /games
@   0.0   B [                         ]  tmp
Tip: ncdu can drop you into a shell in the selected directory. This is the procedure I use to uninstall space eaters:
- launch
ncdu -rx / - navigate to a large directory (usually this will be something in
/usr/shareor/usr/lib. - press
b(short for bash) to drop you into a shell - in the shell session, use
rpm -qf ${PWD}/FILENAMEto find which package owns the file(s) - optionally issue
devel-su pkcon remove -u packagenameto get rid of the space-eater. - press
Ctrl-Dor issue theexitcommand to get back intoncdu. - repeat.
Of course you can also use Ctrl-Z to send ncdu to the background, and call it back with fg.
Note: You primarily should be looking for stuff under /usr/share. Maybe /usr/lib*, but that’s dangerous. No matter what you do, things like /system /vendor and the like are absolutely off-limits (see the note above).
Keeping backups
If you want you can download a back-up of any RPM package you remove. If you do, do store it under /home ![]()
Example:
nemo@PGXperiiia10:~ $ mkdir ~/Downloads/RPM-Packages/
nemo@PGXperiiia10:~ $ pkcon download ~/Downloads/RPM-Packages/ PACKAGENAME
2. Removing Applications
While you can remove apps by long-pressing on their icons, or from Jolla Store, uninstalling this way may leave dependencies installed. So again, we use zypper.
Again, removing Android Apps is not necessary or meaningful.
With the exception of AppSupport, uninstalling an app does not remove your user data, and you can simply re-install them after the update.
As a rule of thumb, packages starting with harbour- are generally safe to be removed and can be re-installed later. Be careful with anything with sailfishos or jolla in the name. Do not touch things with patterns, hybris, droid, or lipstick in the name. Oh, and glibc stays.
Invoking zypper
WARNING WARNING WARNING
Zypper will warn you if you try to uninstall critical packages.
If zypper says:
This request will break your system!
it means it.
Never ignore these warnings. Never choose ignore. Never use zypper --no-confirm.
Do use --dry-run if you’re not sure!
The general procedure is invoking zypper like this, replacing "[PACKAGENAME]" by the RPM package name (not necessarily the application name) to uninstall.
# become root
devel-su
# check what will be done
zypper remove -u --details --dry-run "[PACKAGENAME]"
# do it
zypper remove -u "[PACKAGENAME]"
Note the -u parameter, this will cause zypper to also uninstall dependencies which are not required any more.
Here’s a list of Apps which are quite large, and if you can, you should remove them first.
Jolla apps
- Andoid™ AppSupport
AppSupport is one of the largest packages around and uninstalling it will quickly free up a lot of space. However, uninstalling this may have unintended side effects. - Mozilla Location Services data
Most other Jolla apps are quite small and you can probably just leave them alone.
Other Sailfish apps from various sources
- harbour-dsnote
- harbour-machines-vs-machines-sfos
- harbour-multimodal
- harbour-jupii
- harbour-fernschreiber
- harbour-whisperfish
- harbour-maelstrom
- harbour-owncloud
- harbour-saildiscord
- harbour-sailpipe
- stellarium
- harbour-sshazam
- anything Qt6-related from Chum (like Angelfish)
3. Removing other packages
Qt packages from Chum
These are quite a lot of packages, and removing them one by one can be tedious. So we again invoke zypper’s dependency magic and call it on the base package:
zypper remove -u qt6-qtbase
The Chum packages for Qt5.15 install into /opt. Depending on the device, /opt may or may not be located on the root partition. If it is, removing these makes sense, otherwise, probably not:
zypper remove -u opt-qt5-qtbase
Afterwards, find any stray packages like so:
find /opt/qt5/ -type f -exec rpm -qf {} + | sort -u
find /usr/lib64/qt6/ -type f -exec rpm -qf {} + | sort -u
Python or Perl
Apps which depend on Python or Perl can pull in quite large dependencies.
rpm -q --whatrequires /usr/bin/python3
rpm -q --whatrequires /usr/bin/perl
will list such packages (and the dependencies)
Other large packages (mainly developer tools)
- rclone
- vim (yes, really!) (30MB)
- git (13MB, plus it pulls in perl with 30MB)
- osc, spectacle (because Python)
- any -devel packages
- gcc, gdb, valgrind, cmake, autotools, …
4. Deleting other files
DANGER DANGER DANGER
This part is intended for desperate cases, and should ONLY be attempted by users who know what they are doing here.
You have been warned!
I know what I'm doing
The following locations contain system files which can not easily be removed using a package, but may be deleted individually.
Deleting this stuff should be safe, as the files will be re-installed during the update.
Do NOT simply delete the whole directory! Rather, delete individual files, e.g. translation files for languages you do not use. And be careful with your wildcards, do use rm -i!
/usr/share/locale(43MB),/usr/share/translations(42MB)/usr/share/ambience(50MB)/usr/share/fonts/wqy-zenhei(12MB)/etc/skel/Pictures(14MB)/etc/skel/Videos(12MB)
Stuff in /usr/share/doc and /usr/share/man is probably also safe to delete.
Be careful about /var/.
You will be tempted by /usr/lib64/xulrunner-qt5-*/libxul.so. Leave it. It is not worth the pain.
Others:
/var/lib/plocate- Privoxy: If using AB2P packages
/usr/share/harbour-privoxy/conf/extracan be quite large. Delete them, and reinstall the AB2P package after the update.
If something goes wrong
Error recovery is a bit out-of-scope of this guide, and it will depend very much on the actual problem. But we can offer this:
Save your session or command line history
Depending on the terminal you use, you may be able to copy the output of your terminal session somewhere.
Doing this will be very useful when asking for help.
If you’re using screen, you can scroll back in the buffer by issuing Ctrl-A Esc, and use the cursor keys to scroll up. Pressing space will start copy mode. Pressing space again will copy the selected text into the (screen) clipboard. issuing Ctrl-A ] will paste these clipboard contents.
So after copying you could do:
cat > session.log
Ctrl-A ]
Ctrl-D
To save the history of commands you issued, you can
history > ~/session_history.txt
Package install/uninstall history
The package manager keeps a log of events at /var/log/zypp/history.
While that file is a little hard to read, it can be used to find out which packages were installed or uninstalled, whether that was successful, and when that happened.
Shameles Plug: this author’s app “Install History” can be used to make the file contents a bit more readable. And you get bar charts!
Restoring files
So you have deleted or otherwise or changed some file and would like to get it back.
You can find out which package owns a file using
rpm -qf filename or path
You can re-install a package like so:
zypper install --force packagename
pkcon install --allow-reinstall packagename
If you want to find out the original content of a file (e.g. a config), you can download the RPM, unpack it, and look at the files:
# download the package
mkdir ~/Downloads/rpms
pkcon download ~/Downloads/rpms packagename
# find out the exact file name
ls ~/Downloads/rpms
# unpack the contents into a temporary directory
mkdir ~/unpack
cd ~/unpack
rpm2cpio ~/Downloads/rpms/package-1.2.3.aarch64.rpm | cpio -id
# ~/unpack will now contain all the original files.